
What Is Concrete Crack Injection?
Concrete crack injection is a repair technique that restores structural integrity by filling cracks with a liquid resin — typically epoxy or polyurethane — that bonds the crack faces together and seals the crack against water and chemical penetration. The method works by injecting resin under controlled pressure (or gravity) through ports installed along the crack, forcing the material deep into the fracture where surface-applied sealers cannot reach.
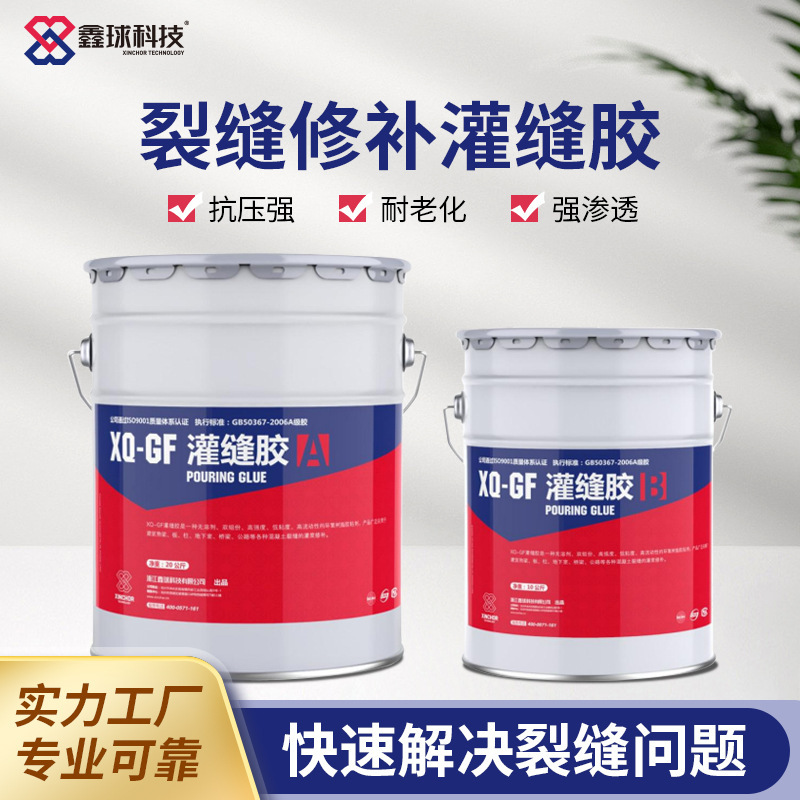
According to ACI RAP-1 (Structural Crack Repair by Epoxy Injection), epoxy crack injection can restore structural integrity to cracked concrete members and is effective on cracks as narrow as 0.05 mm (0.002 inches). The method is recognized by ACI 224.1R and referenced in most national concrete repair standards worldwide, making it the accepted structural repair approach for dormant cracks in load-bearing concrete.
As a manufacturer producing crack injection systems for over 20 years, we have supplied materials for thousands of structural repair projects across more than 30 countries. This guide covers everything you need to know about concrete crack injection — from crack assessment and resin selection to injection procedures, costs, and troubleshooting.
When Does a Concrete Crack Need Injection?
Not every crack in concrete requires injection. Hairline shrinkage cracks in non-structural elements can often be left alone or sealed with a surface coating. But certain crack types demand epoxy crack injection to prevent progressive structural damage.
Cracks that require injection include:- Structural cracks wider than 0.2 mm in load-bearing members (beams, columns, shear walls, foundations)
- Cracks in water-retaining structures (tanks, basins, tunnels) regardless of width
- Cracks in prestressed or post-tensioned concrete where tendon corrosion protection is critical
- Foundation cracks allowing water ingress into basements or below-grade spaces
- Cracks in bridge decks, piers, and girders that compromise durability or load capacity
- Hairline plastic shrinkage cracks (less than 0.1 mm) in non-structural slabs
- Pattern cracking (map cracking) from surface drying — treat the cause, not individual cracks
- Active cracks with ongoing movement exceeding 0.3 mm — these require flexible polyurethane, not rigid epoxy
Crack Assessment: The Critical First Step
Before selecting any repair material, the crack must be properly characterized. Skipping this step is the most expensive mistake in concrete crack repair — you may inject the right resin into the wrong type of crack.
Width Measurement
Use a crack comparator card (optical gauge) or digital crack microscope. Width is the primary factor determining which resin viscosity and injection method to use.
| Crack Width | Classification | Recommended Resin | Injection Method |
|---|---|---|---|
| 0.05–0.2 mm | Hairline | Low viscosity (150–300 mPa·s) | Gravity feed or capillary |
| 0.2–0.5 mm | Fine | Low viscosity (150–300 mPa·s) | Low-pressure injection |
| 0.5–1.0 mm | Medium | Low or medium viscosity | Pressure injection (0.2–0.4 MPa) |
| 1.0–3.0 mm | Wide | Medium viscosity (1,000–2,000 mPa·s) | Pressure injection (0.3–0.6 MPa) |
| 3.0–5.0 mm | Very wide | Medium viscosity | Pressure injection, may need multiple passes |
| Above 5 mm | Joint or void | Grouting material, not injection resin | Gravity pour or pump |
Depth Assessment
Core samples or ultrasonic pulse velocity testing can determine crack depth. Surface cracks (less than 50 mm deep) may only need surface sealing with crack surface seal paste. Through-cracks require full-depth injection from one or both sides.
Activity Status
Is the crack still moving? Monitor with a crack gauge or simple pencil marks over 2 to 4 weeks. Dormant cracks (stable width) can be structurally repaired with rigid epoxy injection. Active cracks (changing width due to thermal cycling, ongoing settlement, or live loads) require flexible polyurethane crack sealant — rigid epoxy will simply crack again adjacent to the repair.
Cause Determination
Understanding why the crack formed prevents recurrence. Common causes include structural overloading, differential settlement, drying shrinkage, thermal cycling, alkali-silica reaction (ASR), and corrosion of embedded reinforcement. If the root cause is not addressed, new cracks will form even after a perfect injection repair.
Choosing the Right Injection Resin
We manufacture two primary epoxy injection resin grades, each formulated for specific crack widths and injection methods. Both comply with ASTM C 881 Type IV (load-bearing applications) and achieve bond strength that exceeds the tensile strength of the parent concrete.
Low-Viscosity Crack Injection Resin (XQ-LF-L)
Our Low-Viscosity Crack Injection Resin has a viscosity of 150 to 300 mPa·s at 25°C — roughly the consistency of cooking oil. This ultra-thin formulation penetrates cracks as narrow as 0.05 mm through capillary action alone.
- Viscosity: 150–300 mPa·s at 25°C
- Tensile strength (cured): ≥ 40 MPa
- Compressive strength: ≥ 60 MPa
- Bond strength to concrete: ≥ 3.5 MPa (concrete substrate failure mode)
- Gel time: 60–90 minutes at 25°C
- Full cure: 48 hours at 25°C
- Best for: Hairline to fine cracks (0.05–0.5 mm), slab cracks, basement wall cracks, bridge deck cracks
Medium-Viscosity Crack Injection Resin (XQ-LF-M)
Our Medium-Viscosity Crack Injection Resin has a viscosity of 1,000 to 2,000 mPa·s — similar to honey. This thicker formulation is designed for wider cracks where low-viscosity resin would drain through before curing.
- Viscosity: 1,000–2,000 mPa·s at 25°C
- Tensile strength (cured): ≥ 35 MPa
- Compressive strength: ≥ 65 MPa
- Crack width range: 0.5–5.0 mm
- Gel time: 45–60 minutes at 25°C
- Full cure: 24 hours at 25°C
- Best for: Wide structural cracks, construction joints, foundation cracks with water ingress history
Epoxy vs Polyurethane: Which to Choose?
| Property | Epoxy Injection | Polyurethane Injection |
|---|---|---|
| Crack type | Dormant (stable) | Active (moving) |
| Structural repair | Yes — restores load transfer | No — seals only |
| Water resistance | Excellent after cure | Excellent, cures in wet conditions |
| Flexibility after cure | Rigid | Flexible (±25% movement) |
| Bond strength | ≥ 3.5 MPa | ≤ 1.0 MPa |
| Can stop active leaks | No — needs dry surface | Yes — reacts with water |
| Cost per liter | $15–25 | $20–35 |
| Typical applications | Structural cracks, foundations | Water-stop, expansion joints |
Our polyurethane crack sealant (XQ-LF-PU) is the right choice when the crack cause has not been resolved and ongoing movement is expected. For active water leaks, inject polyurethane first to stop the water, then follow with epoxy injection for structural repair once the crack is dry.
Pressure Injection vs Gravity Feed
Two fundamentally different injection methods exist, and choosing the wrong one wastes material and compromises repair quality.
Pressure Injection
Uses a positive displacement pump, air-actuated caulking gun, or paint pressure pot to force resin into the crack under controlled pressure (typically 0.2 to 0.6 MPa). This is the standard method for vertical and overhead cracks, and for any crack deeper than 100 mm.
Advantages: Complete penetration through full depth, works on any orientation, controlled fill rate. Limitations: Requires injection equipment, risk of over-pressurizing and extending the crack.Gravity Feed
Resin is simply poured into surface-mounted ports or directly into the crack opening, relying on gravity and capillary action to draw resin downward into the fracture. Used primarily for horizontal surfaces (slabs, bridge decks, pavements).
Advantages: No special equipment needed, lower labor cost, minimal risk of crack extension. Limitations: Only works on horizontal surfaces, limited penetration depth, slower fill.| Factor | Pressure Injection | Gravity Feed |
|---|---|---|
| Crack orientation | Any (vertical, horizontal, overhead) | Horizontal only |
| Penetration depth | Full member thickness | Limited (typically top 50–100 mm) |
| Equipment needed | Injection pump + ports + seal paste | Ports or funnel only |
| Typical pressure | 0.2–0.6 MPa | Atmospheric (gravity) |
| Labor intensity | Higher | Lower |
| Cost per meter | $8–15 (material + labor) | $4–8 (material + labor) |
| Best for | Structural repair of walls, beams, columns | Slab and deck crack sealing |
Step-by-Step Concrete Crack Injection Procedure
Whether using pressure injection or gravity feed, the procedure follows the same fundamental sequence. The steps below align with ACI RAP-1 recommendations.
Step 1: Surface Preparation
Clean the crack surface by removing loose concrete, dirt, oil, paint, and any previous repair material. Use compressed air (minimum 0.5 MPa) and a wire brush. The crack faces must be sound and free of contamination for the epoxy to bond properly. For oil-contaminated cracks, solvent cleaning may be required before injection.
Step 2: Install Injection Ports
Bond injection ports (T-ports or surface-mounted ports) along the crack at intervals equal to the member thickness or 200 to 300 mm, whichever is less. For a 200 mm thick wall, space ports at 200 mm intervals. For through-cracks accessible from both sides, install ports on both faces in a staggered pattern.
Port spacing rule of thumb: The spacing should not exceed the depth of the crack. If the crack depth is unknown, default to 150–200 mm spacing for walls and beams, or the slab thickness for horizontal surfaces.Step 3: Seal the Crack Surface
Apply surface seal paste (XQ-LF-SS) along the entire visible crack length between injection ports. The seal should be approximately 20–30 mm wide, centered on the crack, and at least 3 mm thick. This surface dam prevents resin from leaking out during injection. Allow the seal to cure for 4 to 6 hours before injecting.
Step 4: Inject Resin
For vertical cracks: Start from the lowest port. Inject slowly at 0.2 to 0.4 MPa until resin appears at the adjacent port above. Cap the current port and move the injection nozzle to the port that is now showing resin flow. Continue upward until all ports are filled. For horizontal cracks: Start from one end and work systematically across. For gravity feed on slabs, fill each port and allow 10 to 15 minutes for capillary penetration before moving to the next. For overhead cracks: Use medium-viscosity resin with pressure injection. The resin must be viscous enough to resist gravity draining while still penetrating the crack under pressure.Step 5: Monitor and Top-Up
Some cracks — particularly deep or irregular ones — will absorb more resin as it penetrates into hidden voids. Return to each port after 10 to 15 minutes and top up if the level has dropped. For pressure injection, maintain holding pressure for 1 to 2 minutes after flow stops at each port to ensure complete fill.
Step 6: Cure and Finish
Allow full cure before loading the repaired member: 48 hours for low-viscosity resin, 24 hours for medium-viscosity resin at 25°C. After cure, remove injection ports by gently pulling or twisting, then grind the surface seal paste smooth with a concrete grinder.
Step 7: Verify the Repair
For critical structures, verify repair quality using one or more of these methods: core drilling through the repaired crack to visually inspect resin penetration, pull-off (bond) testing of cores per ASTM C 1583, or ultrasonic pulse velocity testing to detect remaining voids. ACI RAP-1 recommends core sampling of at least 10% of repaired cracks on structural members.
Cost of Concrete Crack Injection
Material and labor costs vary by crack width, depth, member orientation, and project scale. Here are typical costs based on our experience across hundreds of projects:
| Cost Component | Typical Range | Notes |
|---|---|---|
| Injection resin (low viscosity) | $18–25 per liter | Approximately 0.03–0.10 L per linear meter for hairline cracks |
| Injection resin (medium viscosity) | $16–22 per liter | Approximately 0.10–0.50 L per linear meter for wider cracks |
| Surface seal paste | $12–18 per kg | Approximately 0.15 kg per linear meter |
| Injection ports | $0.50–1.50 each | 4–6 ports per linear meter (200 mm spacing) |
| Total material cost | $3–12 per linear meter | Varies primarily with crack width |
| Labor (skilled technician) | $8–20 per linear meter | Higher for overhead and confined-space work |
| All-in cost | $12–30 per linear meter | Economies of scale reduce cost on larger projects |
Troubleshooting Common Problems
Having supported concrete crack injection projects across 30+ countries, here are the problems we see most frequently — and how to solve them.
Resin Not Appearing at Adjacent Port
Cause: The crack may branch internally, the resin may be filling a hidden void, or the port spacing is too wide relative to crack depth. Solution: Continue injecting at low pressure. If no flow after 5 minutes, move to the next port and inject from there. The crack may not be continuous between those two ports.Resin Leaking from Surface Seal
Cause: Insufficient seal thickness, seal not fully cured, or injection pressure too high. Solution: Stop injection immediately. Allow the leaked resin to gel (do not try to clean it while wet). Patch the leak with additional seal paste, wait for cure, then resume injection at lower pressure.Using More Resin Than Estimated
Cause: The crack is wider or deeper than surface measurements indicated, or the crack connects to internal voids not visible from the surface. Solution: This is actually normal for many older structures. Continue injection until the crack is full. Hidden voids being filled is a good outcome — better to find them now than to have them cause problems later.Resin Flowing Too Fast Through the Crack
Cause: The crack is wider internally than at the surface, or is a through-crack with an unsealed exit on the opposite face. Solution: For through-cracks, seal both faces before injection. For wide internal cracks, switch to medium-viscosity resin. If resin flows too freely, allow a small amount to gel in the crack to create a natural dam, then continue injection.Cold Weather: Resin Too Viscous
Cause: Epoxy viscosity increases dramatically below 15°C. Our low-viscosity resin at 200 mPa·s (25°C) becomes approximately 800 mPa·s at 10°C. Solution: Warm the resin in a water bath (30–35°C, never exceed 40°C) before injection. Alternatively, switch to a lower viscosity grade. Below 5°C, postpone injection — cure chemistry slows to the point where reliable bonding cannot be guaranteed.Applications by Structure Type
Bridges
Bridge cracks are among the most demanding injection applications because of high traffic loads, environmental exposure, and access constraints. Deck cracks (typically 0.1–0.3 mm from shrinkage) respond well to gravity-feed injection with low-viscosity resin. Girder and pier cracks (0.3–2.0 mm from overloading or settlement) require pressure injection with medium-viscosity resin. For bridge repair projects, see our parking structure and bridge repair guide.
Foundations and Basements
Basement wall cracks are the most common residential application for epoxy crack injection. Typical cracks are 0.2 to 1.0 mm wide from shrinkage or minor settlement. Low-viscosity resin with low-pressure injection (0.2 MPa) is usually sufficient. Our foundation repair guide covers the full assessment and repair process.
Water-Retaining Structures
Tanks, reservoirs, and water treatment basins require crack injection to restore watertightness. Even hairline cracks (0.05 mm) allow water migration that can corrode reinforcement over time. Use low-viscosity resin for fine cracks; for cracks with active water seepage, inject polyurethane first to stop the water, then follow with epoxy for structural repair.
Industrial Floors and Pavements
Floor cracks in warehouses, factories, and parking structures are typically repaired by gravity-feed injection with concrete floor crack sealer (XQ-LF-FC) — a self-leveling low-viscosity epoxy specifically formulated for horizontal applications. For floor cracks wider than 3 mm, see our epoxy crack filler guide.
Tunnels and Underground Structures
Tunnel lining cracks require pressure injection from the interior face, often in damp or wet conditions. For active water ingress, our polyurethane foam injection stops the leak immediately, followed by epoxy injection for permanent structural repair. See our underwater concrete repair guide for specialized underwater applications.
Industry Standards for Crack Injection
Concrete crack injection is governed by several international standards that specify material properties, testing methods, and application procedures:
- ACI RAP-1: Structural Crack Repair by Epoxy Injection — the primary reference for injection procedure, port spacing, and verification testing
- ASTM C 881: Standard Specification for Epoxy-Resin-Base Bonding Systems for Concrete — classifies injection resins by Type (structural vs non-structural), Grade (viscosity), and Class (temperature range). Our injection resins comply with Type IV (load-bearing), Grade 1 (low viscosity)
- ACI 224.1R: Causes, Evaluation, and Repair of Cracks in Concrete Structures — covers crack assessment methodology
- EN 1504-5: Products and Systems for Repair of Concrete Structures — European standard for concrete injection, specifying performance requirements for injection products
- ASTM C 1583: Tensile Strength of Concrete Surfaces and the Bond Strength of Concrete Repair and Overlay Materials by Direct Tension (Pull-off) — used for verifying bond quality after injection
Complete Crack Repair System
A successful concrete crack injection requires more than just the resin. Our complete crack injection system includes:
- Low-Viscosity Injection Resin (XQ-LF-L): For hairline to fine cracks (0.05–0.5 mm)
- Medium-Viscosity Injection Resin (XQ-LF-M): For wider cracks (0.5–5.0 mm)
- Surface Seal Paste (XQ-LF-SS): Prevents resin leakage during injection
- Polyurethane Crack Sealant (XQ-LF-PU): For active/moving cracks and water-stop
- Injection ports and accessories: T-ports, surface-mounted ports, and crack comparator cards
Frequently Asked Questions
How strong is an epoxy-injected crack?
When properly injected with our low-viscosity resin (XQ-LF-L), the repaired crack is structurally stronger than the surrounding uncracked concrete. The cured resin achieves tensile strength exceeding 40 MPa, while typical concrete tensile strength is only 2 to 4 MPa. Bond strength testing per ASTM C 1583 results in failure in the concrete substrate — not at the epoxy-concrete interface.
Can epoxy crack injection stop water leaks?
Yes, if the crack is dormant (not actively moving) and the crack faces can be dried before injection. For active water leaks, polyurethane injection is more appropriate because it reacts with water and cures even in saturated conditions. The recommended approach for leaking structural cracks: inject polyurethane first to stop the water, then follow with epoxy injection for structural repair.
What temperature is required for concrete crack injection?
Minimum 5°C for both ambient and substrate temperature. Ideal range is 15 to 35°C. Below 10°C, resin viscosity increases significantly and cure time extends — warm the resin to 30 to 35°C in a water bath before injection. Above 35°C, gel time shortens and the working window decreases — consider injecting during cooler morning hours.
How much does concrete crack injection cost?
Typical all-in costs (material plus labor) range from $12 to $30 per linear meter, depending on crack width, depth, member orientation, and project scale. Material alone costs $3 to $12 per linear meter. Gravity-feed injection on horizontal surfaces is the least expensive method ($4–8 per meter including labor); pressure injection on vertical or overhead surfaces costs more ($12–20 per meter) due to equipment and access requirements.
How long does epoxy crack injection take to cure?
Low-viscosity resin reaches full cure in 48 hours at 25°C. Medium-viscosity resin cures in 24 hours at 25°C. The repaired member should not be loaded until full cure is achieved. In cold weather (10–15°C), add 50 to 100% to the stated cure time. Below 5°C, reliable curing cannot be guaranteed — postpone injection or provide supplemental heating.
Can you inject cracks in prestressed concrete?
Yes, and it is strongly recommended. Cracks in prestressed members expose tendons to moisture and chlorides that cause corrosion, potentially leading to sudden tendon failure. Low-viscosity epoxy injection seals the crack and restores the corrosion barrier. However, the injection pressure must be carefully controlled — excessive pressure can extend cracks in prestressed members. Follow ACI RAP-1 guidelines and consult a structural engineer before injecting prestressed concrete.
What is the difference between crack injection and crack filling?
Crack injection uses pressure or gravity to force liquid resin deep into the interior of a crack, filling it from the inside out. It is a structural repair method. Crack filling applies paste or sealant to the surface of the crack — it seals the crack opening but does not penetrate to depth or restore structural load transfer. For structural cracks, injection is required. For non-structural surface cracks, surface filling may be sufficient.
How do you verify that crack injection was successful?
The primary verification methods are: (1) monitoring resin flow between adjacent ports during injection — confirms crack connectivity and fill, (2) core drilling through the repaired crack to visually inspect resin penetration depth, (3) pull-off testing of cores per ASTM C 1583 to verify bond strength meets specification, and (4) ultrasonic pulse velocity testing to detect remaining voids. For critical structures, ACI RAP-1 recommends core sampling of at least 10% of repaired cracks.
Related Resources
- Resin Injection for Concrete Crack Repair: Complete Guide — Epoxy vs polyurethane comparison, 8-step process, and cost analysis.
- Resin Injection for Foundation Repair: Lab Data — Viscosity-to-crack-width penetration data from manufacturer testing.
- Underwater Concrete Repair: Methods & Materials Guide — Epoxy injection techniques for submerged structures.
- Structural Epoxy: Bond Strength Data & Types — Structural epoxy adhesive for steel bonding and CFRP installation.
- Two-Part Structural Epoxy: Types, Mix Ratios & Bond Data — Understanding the 2-part epoxy adhesive chemistry used in crack injection resins.
- Cementitious Grout Guide: Types & Mix Ratios — Grouting after crack injection has sealed the structure.
Wholesale Crack Injection Resin — Factory Direct
XINCHOR manufactures epoxy and polyurethane crack injection resins at our ISO 9001 certified facility. Wholesale supply available for contractors and distributors worldwide — low-viscosity (100 mPa·s), medium-viscosity (1,000-3,000 mPa·s), polyurethane foam, and complete injection kits with ports and accessories.
Request wholesale pricing or view all crack repair products View our complete crack repair product range or contact our engineering team for project-specific recommendations, technical data sheets, and competitive quotes for your concrete crack injection project.