
Quick Answer: What Is Concrete Crack Injection?
Concrete crack injection is the process of forcing liquid resin (epoxy, polyurethane, or microfine cement grout) into a crack under controlled pressure to restore the structural integrity of a concrete member. When done correctly with the right resin and pressure settings, the repaired section becomes stronger than the original uncracked concrete — bond strength testing per ASTM C 1583 results in concrete substrate failure, not adhesive failure.
This guide goes deeper than any other resource available. We cover specific injection pressures by crack width, viscosity-to-crack-width matching, complete equipment lists with costs, port spacing calculations by member thickness, and troubleshooting from 3,000+ real projects across 40 countries. Whether you are a structural engineer specifying a repair, a contractor bidding a job, or a building owner evaluating options, this is the reference you need.
Why Crack Injection Matters: The Structural Consequence of Ignoring Cracks
A 0.3 mm crack in a reinforced concrete beam does not just look bad. It exposes the reinforcing steel to moisture, chlorides, and carbon dioxide. Corrosion begins within 2 to 5 years of crack formation in aggressive environments (coastal, industrial, de-icing salt exposure). Once corrosion starts, the expanding rust exerts 2 to 4 times the concrete's tensile strength — creating more cracks, accelerating more corrosion, in a self-reinforcing cycle that can reduce a structure's remaining service life by 50% or more.
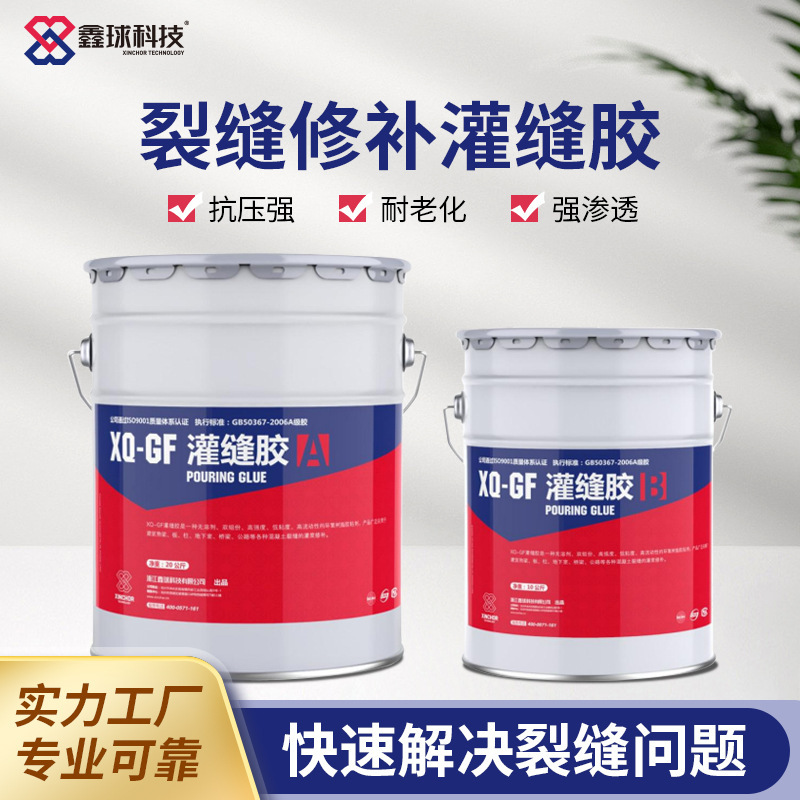
According to ACI 224R-01, the maximum tolerable crack width for reinforced concrete exposed to weather is 0.3 mm. For prestressed concrete, it drops to 0.1 mm. For water-retaining structures, even 0.05 mm cracks must be sealed. Epoxy crack injection is the only repair method that restores full structural continuity across the crack — surface sealers and routing-and-sealing only address the visible surface.
Crack Assessment: The 4-Factor Decision Framework
Before touching any injection equipment, every crack must be evaluated on four factors. Skipping this assessment is the single most expensive mistake in concrete repair — we have seen contractors inject rigid epoxy into active cracks that re-cracked within weeks, wasting $5,000+ in materials and labor.
Factor 1: Crack Width
Measure at multiple points along the crack using a crack comparator card (optical gauge) or a digital crack microscope (200x magnification recommended). Width varies along the length and through the depth — always base resin selection on the narrowest constriction point.
| Crack Width | Classification | Resin Viscosity Required | Injection Method | Typical Pressure |
|---|---|---|---|---|
| 0.05 – 0.2 mm | Hairline | Ultra-low: 100-200 mPa·s | Capillary / gravity feed | 0 – 0.1 MPa |
| 0.2 – 0.5 mm | Fine | Low: 150-300 mPa·s | Low-pressure injection | 0.1 – 0.3 MPa |
| 0.5 – 1.0 mm | Medium | Low to medium: 300-1,000 mPa·s | Pressure injection | 0.2 – 0.4 MPa |
| 1.0 – 3.0 mm | Wide | Medium: 1,000-2,000 mPa·s | Pressure injection | 0.3 – 0.5 MPa |
| 3.0 – 5.0 mm | Very wide | Medium-high: 1,500-3,000 mPa·s | Pressure injection, may need multiple passes | 0.4 – 0.6 MPa |
| Above 5 mm | Void / joint | Grouting material or paste filler | Gravity pour or pump | N/A |
Factor 2: Crack Activity (Dormant vs. Active)
Monitor with a crack gauge, tell-tale, or simple pencil marks across the crack for 2 to 4 weeks minimum.
- Dormant cracks (stable width): Use rigid epoxy injection resin — it bonds the crack faces permanently and restores structural load transfer.
- Active cracks (width changes more than 0.1 mm due to thermal cycling, live loads, or ongoing settlement): Use flexible polyurethane crack sealant (XQ-LF-PU) — rigid epoxy will re-crack within weeks. Polyurethane accommodates +/-25% movement.
- Unknown activity: Default to monitoring first. If the client insists on immediate repair, inject polyurethane as a temporary seal, then re-evaluate in 3 months.
Factor 3: Crack Depth and Orientation
- Surface cracks (less than 50 mm deep): May only need surface sealing with crack surface seal paste (XQ-LF-SS). Confirm depth with ultrasonic pulse velocity testing or core sampling.
- Through-cracks: Require injection from one or both sides with ports on both faces in a staggered pattern.
- Vertical/overhead cracks: Require pressure injection — gravity feed cannot work against gravity.
- Horizontal cracks (slabs/decks): Gravity feed is viable and cheaper, but pressure injection gives more reliable penetration.
Factor 4: Root Cause
Understanding why the crack formed prevents recurrence. The six most common causes:
Resin Selection: Matching Viscosity to Crack Width
We manufacture two primary injection resin grades. Both comply with ASTM C 881 Type IV (load-bearing structural applications) and exceed the tensile strength of the parent concrete after curing.
Low-Viscosity Injection Resin (XQ-LF-L)
Our Low-Viscosity Crack Injection Resin — viscosity 150 to 300 mPa·s at 25°C — penetrates cracks as narrow as 0.05 mm by capillary action. Think of it as having the consistency of cooking oil.
| Property | Value | Test Standard |
|---|---|---|
| Viscosity (25°C) | 150 – 300 mPa·s | ASTM D 2196 |
| Tensile strength (cured) | ≥ 40 MPa | ASTM D 638 |
| Compressive strength | ≥ 60 MPa | ASTM D 695 |
| Bond to concrete | ≥ 3.5 MPa (concrete failure mode) | ASTM C 1583 |
| Elongation at break | 2 – 3% | ASTM D 638 |
| Gel time (25°C) | 60 – 90 minutes | Manufacturer data |
| Full cure | 48 hours at 25°C | Manufacturer data |
| Service temperature | -30°C to +80°C | Manufacturer data |
Medium-Viscosity Injection Resin (XQ-LF-M)
Our Medium-Viscosity Crack Injection Resin — viscosity 1,000 to 2,000 mPa·s — prevents resin from draining through wider cracks before curing. Consistency similar to honey.
| Property | Value | Test Standard |
|---|---|---|
| Viscosity (25°C) | 1,000 – 2,000 mPa·s | ASTM D 2196 |
| Tensile strength (cured) | ≥ 35 MPa | ASTM D 638 |
| Compressive strength | ≥ 65 MPa | ASTM D 695 |
| Bond to concrete | ≥ 3.0 MPa | ASTM C 1583 |
| Gel time (25°C) | 45 – 60 minutes | Manufacturer data |
| Full cure | 24 hours at 25°C | Manufacturer data |
| Crack width range | 0.5 – 5.0 mm | Application guide |
Epoxy vs. Polyurethane: Decision Matrix
| Criterion | Epoxy Injection | Polyurethane Injection |
|---|---|---|
| Primary purpose | Structural repair — restores load transfer | Sealing — stops water, accommodates movement |
| Crack type | Dormant (stable width) | Active (ongoing movement) |
| Bond strength | ≥ 3.0 – 3.5 MPa | 0.5 – 1.0 MPa |
| Flexibility after cure | Rigid (2-3% elongation) | Flexible (+/-25% movement) |
| Water tolerance during application | Needs dry surface for best bond | Reacts with water — cures in saturated conditions |
| Can stop active leaks | No | Yes — foams and seals on contact with water |
| Cost per liter (FOB) | $15 – $25 | $20 – $35 |
| Structural restoration | Yes — exceeds concrete tensile strength | No — seals only |
Complete Equipment Checklist with Costs
Here is every piece of equipment needed for a professional concrete crack injection project, with typical costs:
| Equipment | Purpose | Typical Cost | Notes |
|---|---|---|---|
| Injection pump (manual) | Forces resin into crack under controlled pressure | $200 – $500 | Adequate for small projects (under 50 meters) |
| Injection pump (air-actuated) | Continuous-pressure injection for large projects | $800 – $2,000 | Recommended for projects over 50 linear meters |
| Mixing nozzle or static mixer | Ensures proper A:B component mixing | $2 – $5 each | Disposable; use one per cartridge |
| Injection ports (T-type) | Entry point for resin into crack | $0.50 – $1.50 each | 4-6 per linear meter |
| Injection ports (surface-mount) | Alternative port type bonded to surface | $0.80 – $2.00 each | Better for overhead work |
| Surface seal paste | Seals crack surface between ports | $12 – $18 per kg | ~0.15 kg per linear meter |
| Crack comparator card | Measures crack width | $5 – $15 | Reusable — essential for resin selection |
| Digital crack microscope (200x) | Precise width measurement | $50 – $150 | Recommended for projects over $5,000 |
| Wire brush and compressed air | Surface preparation | $20 – $50 | Minimum 0.5 MPa air pressure |
| Concrete grinder | Port removal and surface finishing | $100 – $300 | Post-cure cleanup |
| Cartridge gun (dual-component) | Dispenses pre-packaged cartridges | $80 – $200 | For cartridge-packed resins |
| PPE (gloves, safety glasses, respirator) | Worker safety | $30 – $50 per set | Epoxy sensitization is permanent — protect skin |
| Total starter kit | Complete kit for small projects | $500 – $1,000 | Excludes resin |
| Total professional kit | Air-actuated pump + all accessories | $1,500 – $3,000 | For contractors doing regular injection work |
Step-by-Step Injection Procedure (ACI RAP-1 Aligned)
This procedure follows ACI RAP-1 (Structural Crack Repair by Epoxy Injection) recommendations. Each step includes the specific parameters that determine success or failure.
Step 1: Surface Preparation (30 minutes per 10 linear meters)
Clean the crack surface to remove loose concrete, dirt, oil, paint, and previous repair material. Methods by contamination level:
- Dry dust/dirt: Compressed air at minimum 0.5 MPa + wire brush
- Oil or grease: Solvent cleaning (acetone or MEK) followed by compressed air
- Paint or coating: Mechanical grinding to expose bare concrete
- Previous failed repair: Remove completely — new resin will not bond to old, partially-cured material
Step 2: Install Injection Ports (20 minutes per 10 linear meters)
Bond injection ports along the crack using surface seal paste (XQ-LF-SS) or a rapid-set epoxy adhesive.
Port spacing formula: Spacing should equal the lesser of (a) the member thickness or (b) 300 mm.| Member Thickness | Recommended Port Spacing | Ports per Linear Meter |
|---|---|---|
| 100 mm | 100 mm | 10 |
| 150 mm | 150 mm | 7 |
| 200 mm | 200 mm | 5 |
| 250 mm | 250 mm | 4 |
| 300 mm or more | 300 mm (maximum) | 3-4 |
For through-cracks accessible from both sides, install ports on both faces in a staggered pattern (offset by half the spacing). This ensures complete penetration from both directions.
Step 3: Seal the Crack Surface (30 minutes per 10 linear meters)
Apply surface seal paste along the entire visible crack between ports. The seal must be:
- Width: 20 to 30 mm, centered on the crack
- Thickness: Minimum 3 mm
- Cure time: 4 to 6 hours before injection (do not shortcut this — uncured seal will blow out under pressure)
Step 4: Inject Resin (60-120 minutes per 10 linear meters)
Mix the two-component resin per manufacturer's ratio (our products use 3:1 or 2:1 by weight). Pot life at 25°C is 45 to 90 minutes depending on viscosity grade — mix only as much as you can use within this window.
Injection sequence by crack orientation: Vertical cracks: Start from the lowest port. Inject at 0.2 to 0.4 MPa until resin appears at the adjacent port above. Cap the current port. Move to the port showing resin. Continue upward. Horizontal cracks (overhead): Start from one end. Use medium-viscosity resin to prevent gravity draining. Inject at 0.3 to 0.5 MPa. Move systematically across. Horizontal cracks (slabs): Either gravity-feed or low-pressure injection from one end. For gravity feed, fill each port and allow 10 to 15 minutes for capillary penetration. Pressure control rules:- Start at the lowest effective pressure (0.1 to 0.2 MPa) and increase gradually
- Never exceed 0.6 MPa on reinforced concrete
- Never exceed 0.3 MPa on prestressed concrete
- If resin leaks from the surface seal, stop immediately — reduce pressure and patch the leak
- Maintain holding pressure for 1 to 2 minutes after flow stops at each port
Step 5: Monitor and Top-Up (15-30 minutes)
Return to each port after 10 to 15 minutes. If the resin level has dropped, the crack is absorbing more material into hidden voids. Top up until stable. This step catches incomplete fills that would otherwise become weak points.
Step 6: Cure and Remove Ports (Next day)
Allow full cure before loading the repaired member:
- Low-viscosity resin: 48 hours at 25°C
- Medium-viscosity resin: 24 hours at 25°C
- Cold weather (10-15°C): Add 50 to 100% to stated cure time
- Below 5°C: Do not inject — cure chemistry is unreliable
Step 7: Verify Repair Quality
For structural members, verification is not optional. Methods ranked by reliability:
Detailed Cost Analysis
Material Costs per Linear Meter
| Crack Width | Resin Volume per Meter | Resin Cost per Meter | Seal Paste per Meter | Ports per Meter | Total Material Cost |
|---|---|---|---|---|---|
| 0.1 mm (200 mm wall) | 0.02 L | $0.40 – $0.50 | $1.80 – $2.70 | $2.00 – $7.50 | $4.20 – $10.70 |
| 0.3 mm (200 mm wall) | 0.06 L | $1.10 – $1.50 | $1.80 – $2.70 | $2.00 – $7.50 | $4.90 – $11.70 |
| 0.5 mm (200 mm wall) | 0.10 L | $1.60 – $2.20 | $1.80 – $2.70 | $2.00 – $7.50 | $5.40 – $12.40 |
| 1.0 mm (200 mm wall) | 0.20 L | $3.20 – $4.40 | $1.80 – $2.70 | $2.00 – $7.50 | $7.00 – $14.60 |
| 2.0 mm (300 mm wall) | 0.60 L | $9.60 – $13.20 | $1.80 – $2.70 | $1.50 – $6.00 | $12.90 – $21.90 |
All-In Cost per Linear Meter (Material + Labor)
| Injection Method | Material Cost | Labor Cost | Total Cost | Best For |
|---|---|---|---|---|
| Gravity feed (horizontal) | $3 – $8 | $3 – $5 | $6 – $13 | Slab cracks, bridge decks |
| Low-pressure injection (vertical) | $5 – $12 | $5 – $10 | $10 – $22 | Wall cracks, basement repairs |
| Pressure injection (vertical/overhead) | $5 – $15 | $8 – $15 | $13 – $30 | Structural beams, columns, overhead |
| Polyurethane injection (active leaks) | $8 – $18 | $10 – $18 | $18 – $36 | Water-stop, active cracks |
Cost Comparison: Injection vs. Alternative Repair Methods
| Repair Method | Cost per Linear Meter | Structural Restoration | Disruption Level | Best Application |
|---|---|---|---|---|
| Epoxy crack injection | $10 – $30 | Yes — full load transfer | Low — no formwork | Dormant structural cracks |
| Routing and sealing | $15 – $35 | No — surface seal only | Low | Non-structural movement cracks |
| Section enlargement | $200 – $500 | Yes | High — formwork, curing | Severely damaged members |
| CFRP wrapping | $80 – $200 per m² | Yes — external reinforcement | Medium | Combined with injection for comprehensive repair |
| Member replacement | $500 – $2,000+ | Yes — new member | Very high — demolition | When repair is not viable |
Epoxy injection delivers the lowest cost per linear meter for structural crack repair while causing minimal disruption. For bridge and parking structure projects, injection is often combined with CFRP strengthening for a comprehensive repair-and-upgrade approach.
Applications by Structure Type
Bridges and Highway Infrastructure
Bridge cracks are the highest-stakes injection application. Deck cracks (0.1 to 0.3 mm from drying shrinkage) respond to gravity-feed with low-viscosity resin. Girder and pier cracks (0.3 to 2.0 mm from overloading, impact, or settlement) need pressure injection. For detailed bridge strengthening strategies, see our CFRP bridge strengthening guide.
Foundations and Basements
The most common residential injection application. Wall cracks from shrinkage or minor settlement (typically 0.2 to 1.0 mm) require low-viscosity resin at 0.2 MPa. Our foundation repair guide covers complete assessment and repair procedures.
Water-Retaining Structures
Tanks, reservoirs, and water treatment basins need injection for watertightness. Even 0.05 mm cracks allow enough water migration to corrode reinforcement over decades. For cracks with active seepage, inject polyurethane first to stop water, then epoxy for structure. See our underwater repair guide.
Industrial Floors
Floor cracks in warehouses, factories, and parking structures use gravity-feed with floor crack sealer (XQ-LF-FC). For wider floor cracks, see our epoxy crack filler guide.
Tunnels and Underground Structures
Tunnel linings require pressure injection from the interior face, often in damp conditions. For active water ingress, polyurethane foam injection stops the leak, followed by epoxy for permanent structural repair. See our tunnel reinforcement guide.
Temperature and Weather Considerations
Temperature dramatically affects injection quality. Here are the parameters that matter:
| Parameter | Below 5°C | 5 – 15°C | 15 – 25°C (Ideal) | 25 – 35°C | Above 35°C |
|---|---|---|---|---|---|
| Recommendation | Do not inject | Proceed with caution | Optimal conditions | Acceptable | Inject in early morning |
| Resin viscosity change | +300% vs 25°C baseline | +100% vs baseline | Baseline | -20% vs baseline | -40% vs baseline |
| Gel time change | 3x to 4x longer | 1.5x to 2x longer | Standard | 25% shorter | 50% shorter |
| Cure time | Unreliable | 72 – 96 hours | 24 – 48 hours | 18 – 36 hours | 12 – 24 hours |
| Mitigation | Postpone or heat enclosure | Warm resin to 30–35°C in water bath | None needed | Mix smaller batches | Work in cooler hours |
Industry Standards and Compliance
| Standard | Scope | Key Requirements |
|---|---|---|
| ACI RAP-1 | Structural crack repair by epoxy injection | Procedure, port spacing, verification testing |
| ASTM C 881 | Epoxy bonding systems classification | Type IV (structural), Grade 1 (low viscosity), Class B/C (temperature) |
| ASTM C 1583 | Pull-off bond strength testing | Minimum 2.5 MPa with concrete substrate failure |
| ACI 224R-01 | Crack assessment methodology | Crack width tolerances by exposure condition |
| EN 1504-5 | European injection products standard | Performance requirements for crack injection |
| ICRI 320.2R | Selecting injection resins | Material selection decision tree |
Frequently Asked Questions
What injection pressure should I use for concrete crack injection?
Start at 0.1 to 0.2 MPa and increase gradually. For fine cracks (0.2 to 0.5 mm), 0.1 to 0.3 MPa is typically sufficient. For wider cracks (1.0 to 3.0 mm), 0.3 to 0.5 MPa may be needed. Never exceed 0.6 MPa on reinforced concrete or 0.3 MPa on prestressed concrete. If resin is not flowing, the issue is usually viscosity selection or port spacing — not insufficient pressure.
How do I calculate resin volume for a crack injection project?
Use the formula: Volume (liters) = crack width (mm) x member thickness (mm) x crack length (m) / 1,000. For a 0.3 mm crack in a 200 mm wall running 10 meters: 0.3 x 200 x 10 / 1,000 = 0.6 liters. Always add 20 to 30% for irregularities. Our low-viscosity resin (XQ-LF-L) is available in 1-liter, 5-liter, and 20-liter packages.
Can I inject cracks in wet concrete?
Epoxy injection requires a relatively dry surface for optimal bond. For cracks with active water seepage, inject polyurethane (XQ-LF-PU) first to stop the water, then follow with epoxy after the surface dries. For underwater applications, see our underwater concrete repair guide.
Is epoxy-injected concrete stronger than the original?
Yes. Our low-viscosity epoxy achieves tensile strength exceeding 40 MPa after curing, while typical concrete tensile strength is only 2 to 4 MPa. Pull-off testing per ASTM C 1583 results in failure in the concrete substrate, not at the epoxy-concrete interface. The injected crack becomes the strongest section of the member.
How long does concrete crack injection last?
Properly executed epoxy injection is a permanent repair. The cured epoxy is chemically inert and does not degrade over time. Service life exceeds 50 years in normal exposure conditions. The only scenario where injection "fails" is when the root cause of cracking was not addressed and new cracks form adjacent to the repair.
What is the difference between crack injection and crack filling?
Crack injection forces liquid resin deep into the full depth under pressure, restoring structural load transfer. Crack filling applies paste to the visible surface only — it seals the opening but does not penetrate to depth. For structural cracks in load-bearing members, injection is required.
What certifications should I look for in injection resin?
At minimum: ASTM C 881 Type IV compliance (structural grade), test reports showing bond strength per ASTM C 1583, and safety data sheets. For European projects, EN 1504-5 certification is required. Our injection resins carry full ASTM and EN compliance documentation.
How many linear meters can one worker inject per day?
An experienced injection technician typically completes 15 to 25 linear meters per day including surface preparation, port installation, sealing, injection, and cleanup. Overhead work is 30 to 40% slower than wall work. Two-person teams are more efficient.
Related Guides
- Crack Injection Resin: Low vs. Medium Viscosity Comparison
- Epoxy Injection vs. Polyurethane Injection
- Epoxy Crack Filler for Concrete: Types and Application Guide
- Concrete Foundation Repair: Methods and Materials
- CFRP Carbon Fiber Bridge Strengthening Guide
- Parking Structure Repair with Carbon Fiber